Tuesday, March 19, 2013

Projects and Waiting for Spring!

A big and warm hello to all of you blog friends out there!

Thank you for your kind and inspiring comments. Your support and suggestions have been wonderful and have encouraged me to keep moving forward. Thank you! I've greatly enjoy reading each and every comment. I've also enjoyed reading your blogs too. There are some terrific and creative projects going on with you all for sure. Yay!

It's been a busy few weeks as I try to finish a ton of projects with my real house. Amongst the painting and woodworking, we were blanketed with another snowstorm here in the Twin Cities earlier this week. Will spring ever come again? It seems light years away. The snowy weather has made the construction work on my house even more laborious. Hauling lumber through snowbanks and over icy sidewalks has not been fun, to say the least. If I have to shovel my walk and driveway one more time, I'll scream...right after I take some Ibuprofen for the pains in my back! Ha ha!

I haven't had much time to work on Barton Cottage, but I have included a few more photos of the different rooms. I know it's just a cardboard mock-up, so there's not a lot to look at during this time. But hopefully it will give some semblance of what the room dimensions and layout will be.

I've also posted a few photos from the latest meeting of our local miniatures guild. I joined the Midwest Miniatures Guild early this year. It's been a fun and rewarding experience, and the members are very welcoming and quick to share their knowledge. I took a couple of workshop classes at our February meeting. Barbara Nygaard taught classes featuring a hanging room box and a history vignette of a desk, books, letters, and newspapers.

My desk project in mid process and a tiny bundle of newspapers.
One of our February classes at the Midwest Miniatures Guild.
A cute box of maps and an atlas of Minnesota, of course.
Below are a few more pictures from my Barton Cottage. Again, I know it's not much to look at, but hopefully soon I'll will be able to get the actual lumber cut and get moving again.

I added a dressing room between the bathroom and bed chamber. There was a lot of space in the bathroom--too much actually. So I decided to divide the room in half and add a small room as a dressing space. I also noticed that there was a lot of space in the attic. So I made an opening in the dressing room ceiling for a stair ladder. I'm not sure what I'll put up in the attic, but I thought it would be good to have a way of getting up there. Any ideas? Sewing room? Dusty storage?

For the bathroom, I thought an arch doorway would tie the dressing room and the bathroom together. I also added a platform to raise up the bathtub. I thought this would highlight the tub and add some visual interest to the back of the room.

The kitchen area and stairway leading to the second floor.
A close up of the parlour with the opening for the window seat on the far wall.
A view looking to the dining area and the opening for the stairs.
Another view looking from the parlour to the dining and kitchen area.
A view from the bed chamber looking into the dressing room and stairwell.
The bed chamber.
The dressing room with an opening for a stair ladder to the attic.
The bathroom with arch doorway and platform for the tub.
I guess I have a lot of work ahead of me on both my real house and Barton Cottage. Lately my motto has been "slow and steady wins the race." So, step by step, little by little, I am moving forward. I hope to have some more pictures and updates on both my real house and the cottage very soon.

In the meantime, I wish you well and look forward to keeping up to date on all your beautiful projects. Keep the comments and suggestions coming. I promise to have some more interesting stuff soon!

All best,
Brad

Monday, March 11, 2013

Updates: Barton Cottage and the Real House

Hey blog buddies!

How are you all doing?  Thank you for your encouraging and lovely comments. It's absolutely wonderful and heartwarming to meet you all.  I feel like I've just made a whole new group of friends.  Yay!

Wow.  It's been a busy couple of weeks. Life is over flowing these days.

Teaching and singing have been going gang busters and...drum roll please...I've decided to put my real life house on the market. I now have a million construction and painting projects going on around me. Ach! As I sit here huddle in my office, I'm surrounded by packing boxes and dust from all the work going on.  Here's a brief summary...I won't try and bore you...well, at least not that much.

I bought a 1903 folk Victorian back in 2007.  It was a good house--good bones, solid, and had most of its original woodwork.  But OMG did it need work!  I had big dreams and so I dove in.  I put in a new kitchen and bathroom, and had all the wood floors refinished.  Since then I have been slowly (key word slooooooowly) restoring a lot of the walls and woodwork in the other rooms. It's been a GINORMOUS labor of love for sure. But now it's time to fast forward and get all the remaining projects on my "To Do" list done as fast as possible.  Zoinks! For an anxiety ridden perfectionist control freak like me--this is a nightmare come true. But deep breath, here I go.

I have managed to get a little time for miniatures here and there.  Not as much as I would like of course, but life needs attending to.

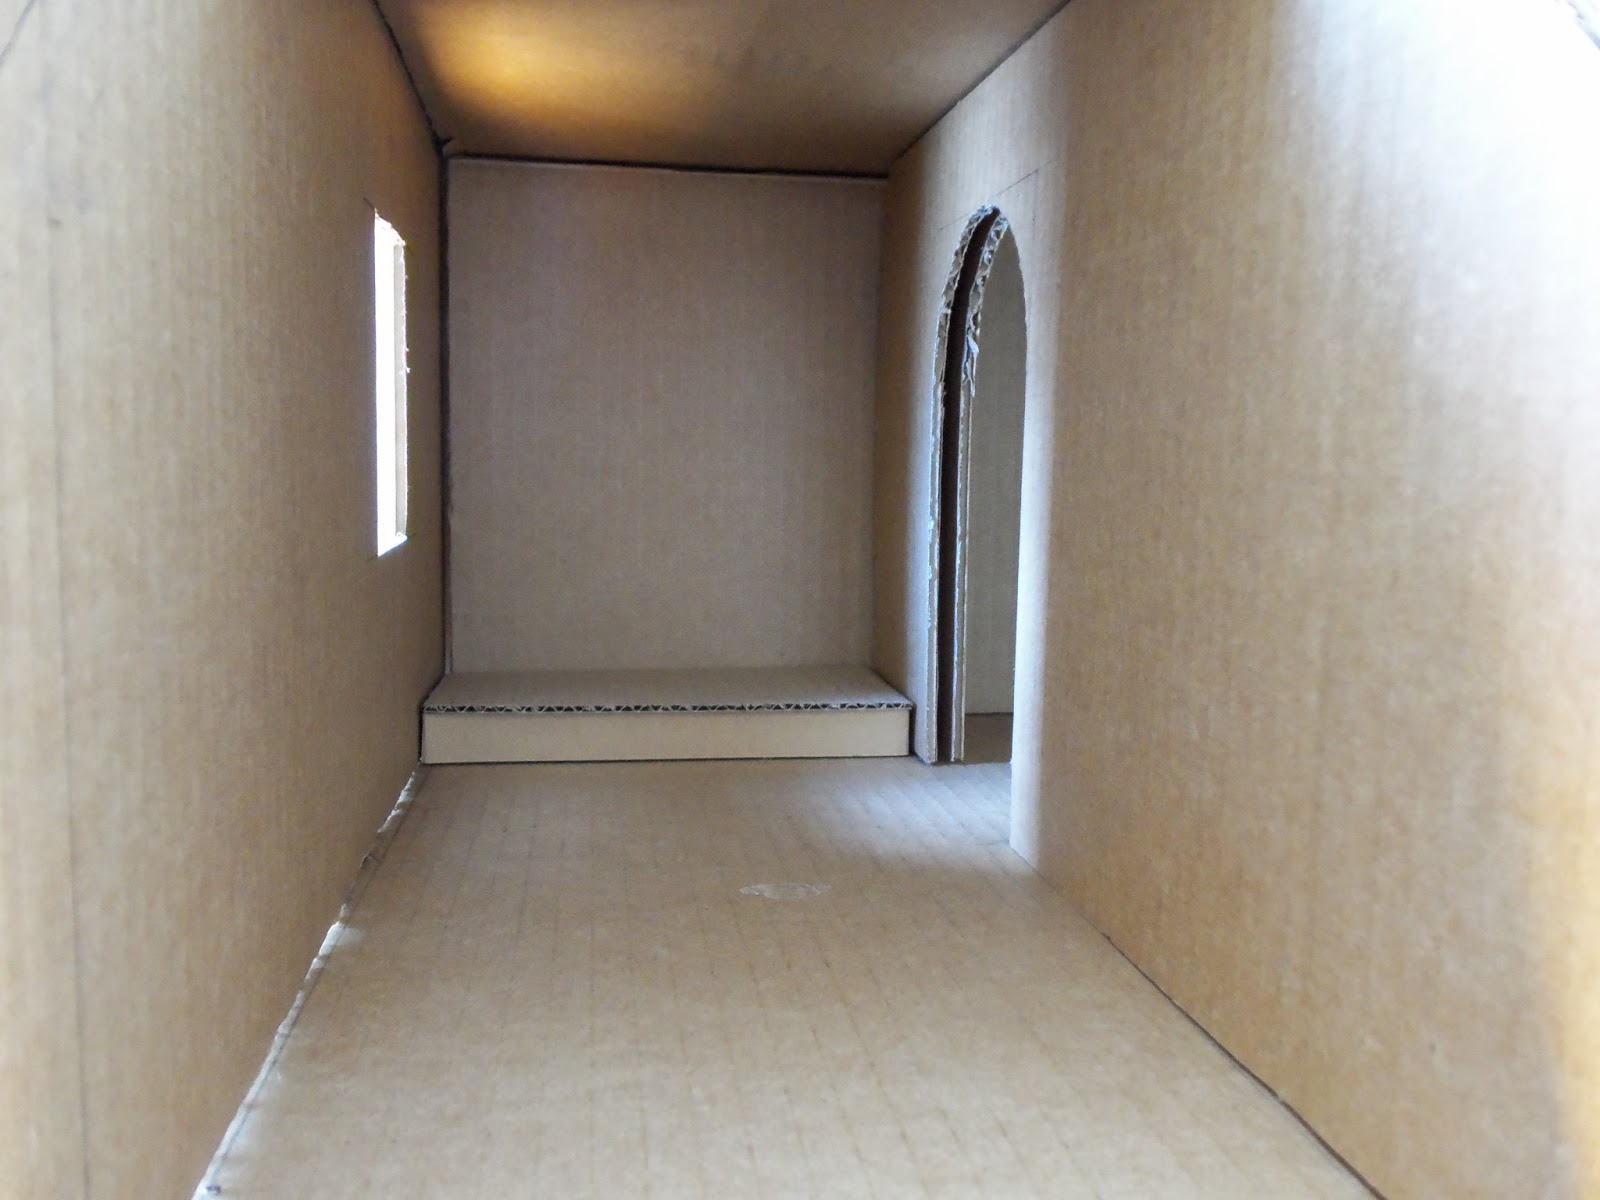
I've almost completed the cardboard mock-up of Barton Cottage.  I have been playing around with different sizes for rooms and several perspectives.

The cardboard mock-up of Barton Cottage.

I've tried to achieve a design plan that looks realistic in some regard and yet is open enough so that points of interest can be seen. For starters, the fireplace placement.

I originally had the fireplaces located on the far back wall, but decided to move them to the center wall of the cottage. I think it adds a little interest to the middle of the structure and provides a bit of division between the various rooms. I played around quite a bit with the proportions of the chimney walls and mantle surrounds, etc. Here are my first two attempts at the parlour fireplace. This is just a mock-up to explore size and shape. The final versions will be much more detailed of course. Fingers crossed.

First (left) and second (right) attempts at the parlour fireplace.

After my first attempt, I found this lovely limestone fireplace example. So I think this is what the parlour fireplace will look like when all finished.  Again, fingers crossed.

A lovely limestone fireplace. Sweet!


And here it is in the cardboard mock-up.  This view is looking in from the front door.

The parlour fireplace. Come on in. Hot chocolate anyone?


Here's the bed chamber fireplace. A bit more simple in size, but cozy. What do you think?  I'm trying to decided what to do for the bed chamber fireplace surround.  Stone or wood?  Rustic or more refined?  Ideas?

What to do with the bed chamber's fireplace surround? Hmm...stone, wood, plaster, mirrors and disco ball?

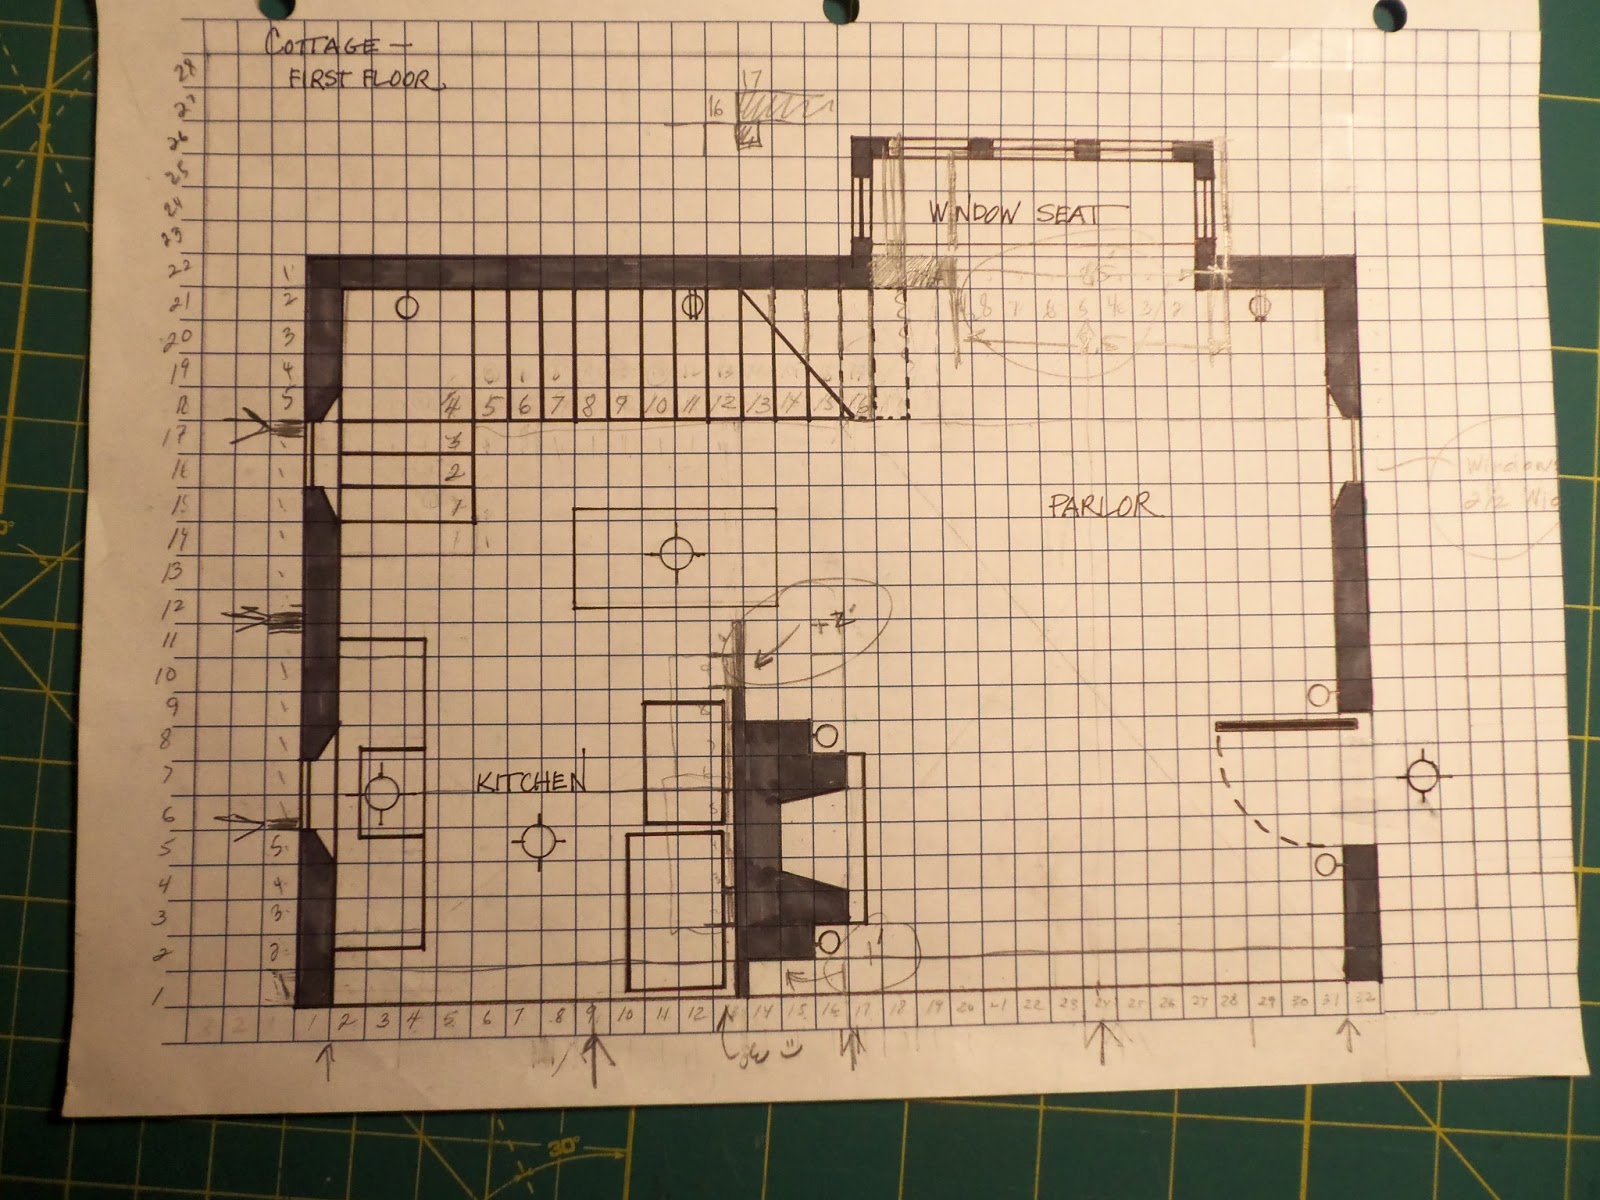
The floor plans for the cottage are a hot mess right now.  I've been moving walls around, shifting windows, and expanding and contracting things like mad with the cardboard model.  So, excuse the messy drawings.  Here's the first draft of the first floor, second floor, and a side elevation.

The first floor plan.


The second floor plan.


Front door side elevation.

Here are a few sketches I've doodled. I really like the idea of a cute window seat on the back wall.  Since I move the fireplaces, I thought the parlour needed another point of interest. Although I know it won't be quite historically accurate, I incorporated a long set of flowing stairs that turn in an L shape. I quickly sketched some ideas for the bathroom, kitchen, and front door porch. I'm thinking 1930's shabby chic, maybe?

Sketches of the exterior and  parlour window seat.

Doodles of ideas for the kitchen, bathroom tub, fireplace, and stairs.

So friends, that is it from here. I must get back to work on my real life house and see how fast I can get it  completed. It will be a journey of patience for sure. In the meantime, I will try to post some more pictures of Barton Cottage along the way. I hope to find some time between work and the house crunch to update my blog.

Again, I thank you all very much for your comments and interest.  I have been marveling at all your terrific creations too. There has been a flurry of blogging lately. It's wonderful. I hope you are doing well and having fun creating. Let me know what you think of the above. I wish you the best and look forward to hearing from you!

Sunday, March 3, 2013

The First Project...For Real This Time

Hey everyone, I finally have a project of appropriate scope for little ol' beginner me. I decided for my maiden voyage I will build an English cottage house. Now I know you're all so excited and won't be able to contain your enthusiasm, so go ahead and shout it out!  Yay!  There. Don't you feel much better now?

It will be named "Barton Cottage" in honor of the cottage in one of my favorite movies Sense and Sensibility based on the book by Jane Austen. Although Austen sets her story in the mid to late 1790s, I am not quite sure what period my cottage will be. I could see the cottage being build in the late 18th century and then modernized as time went on. The structure could be part of a larger English estate, perhaps originally intended for a worker or service person. Something like that anyway.

Although I think authenticity is one of the most valuable aspects of miniatures, I think this for this project I will focus on developing a few techniques. Here are a few areas on which I would like to practice:

1. Plaster Walls
2. Fireplaces
3. Stairs
4. Wood Flooring
5. Beamed Ceilings
6. Leaded Windows
7. Lighting

I think this should give me enough to work on. Right? Or have I lost my mind?

I discovered a perfect example of a cottage modernized for contemporary life. The little English cottage in the movie The Holiday is really cute and charming. I think I will try and use certain details from this cottage for my project. Here are a couple of pictures. I love the warmth of the beamed ceiling and the cozy feel of the furnishing and fireplace.

Interior cottage shot from The Holiday. I am so going to make that ottoman.

I love the beams on the ceiling and the thick plaster walls. 

Another interior shot.

For the exterior, I was thinking natural stone for the walls and slate for the roof. I lived in Scotland for a little while and fell in love with all the crow stepped gabbles I saw there. I thought I would throw that design element in the mix too. We'll just say that my little cottage house is on the north side of England. Here's some ideas of what the exterior might look like.

A cute little entryway will be perfect.

I like the aged look of this slate roof.

The windows on this cottage are perfect. Look at the stonework.

Here's a good example of crow stepped gables. I like the aged natural stone too.

More crow stepped gables.

So these are a few ideas I have. I've started some drawings and a cardboard mock-up. I'll show you those in my next post. I thought it would be good to do a cardboard model of the cottage so that I can make sure the proportions look correct. Sometimes what I put on paper doesn't always look right when realized in the three dimensional realm. A model helps me figure it all out. I've been making small adjustments to the floor plans and elevations here and there.

Sorry this is all so boring and that I don't have many examples of my own work just yet. I've done a ton of research for this project. I guess I want to make sure I have some good ideas before I pull out the table saw and start cutting. So hold on, there will be examples of the actual cottage coming soon.

Take care, friends! Come back soon for more Barton Cottage adventures!